Documentation :: Teachers :: Student Accounts :: Create multiple student accounts by importing a CSV file
If you want to add an entire roster of students to ChemQuiz at once, it’s much faster to upload them as a CSV file. CSV stands for “comma separated values”, and it’s a universal spreadsheet format that’s used for moving data between Microsoft Excel, Google Sheets, and other software platforms. In a CSV, each row represents one student, and the data is separated by commas. Every LMS (Learning Management System) supports CSV imports and exports.
To create student accounts by uploading a CSV, I recommend using this Google Sheet:
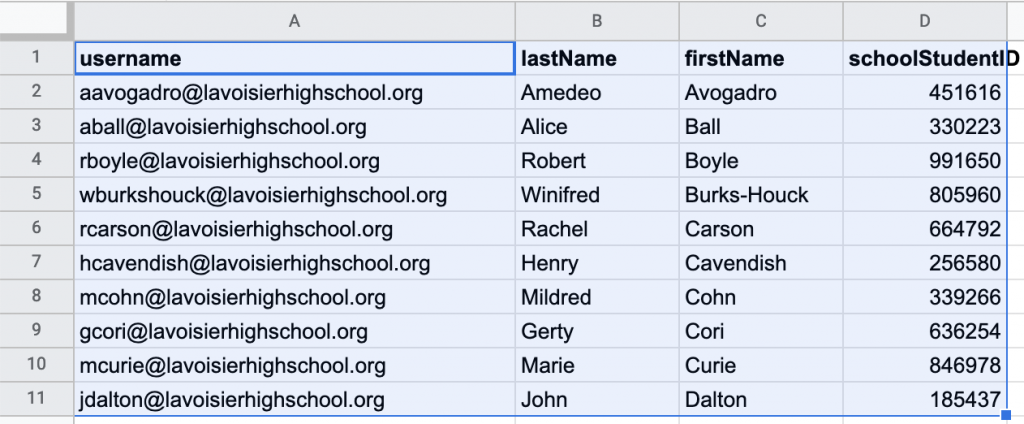
In Google Sheets, click on the File menu and select Make a copy. At the top of the Sheet, you’ll see five column names:
username,lastName,firstName,schoolStudentID,password
The only required field is username, which must be the student’s complete email address (i.e., flast123@schooldistrict.com). You can then enter your students’ information one row at a time, or you can copy and paste from an existing roster file and rearrange the columns to match up with the template. You can also do this in Microsoft Excel or Apple Numbers. The schoolStudentID field is meant to make it easier to import scores into another LMS but it’s not required.
Once you’ve prepared your roster, you can import your students into ChemQuiz.net in one of three ways. To import students, go to the ChemQuiz.net Dashboard and click on Students:

Click the red Create New Student Account(s) button:

At the top of the form, click the link that says, “Click here to create multiple new student accounts by uploading a CSV instead.” On that page, there are three options for importing:
1. Upload a CSV file
- To save your Google Sheet as a CSV file, click on the File menu, select Download, and then select Comma-separated values (.csv, current sheet). Your browser will download the CSV file.
- After following the steps above, click the Choose File button and navigate to the CSV that you downloaded (probably in your “Downloads” folder):

- Click the red Upload CSV File button. Your new student accounts will be ingested into the system shortly.
2. Link to a Google Sheet
- First, in your Google Sheet, click the green Share button in the upper right corner:

- In the lower left corner of the pop-up window, click on the blue Change link (it might list the name of your school district).
- Click on the dropdown menu on the left and select “Anyone with the link“, and then click the blue Copy link link on the right.
- On the ChemQuiz.net CSV upload page, under “Link to a Google Sheet“, copy and paste the share link in the box:

- Click the red Upload Google Sheet button. Your new student accounts will be ingested into the system shortly.
3. Paste CSV in the box
- In the Google Sheet, select all of the cells that contain the students you want to import and copy them by highlighting them and then either click Edit and then Copy, or press the hotkey combination to copy the data to your clipboard (Ctrl-C on Windows, ChromeOS or Linux; Cmd-C on Mac):
- On the ChemQuiz.net CSV upload page, under “Paste CSV in the box below“, click in the textbox and click Edit and then Paste, or press the hotkey combination to paste the data in the box (Ctrl-V on Windows, ChromeOS or Linux; Cmd-V on Mac):

- Click the red Upload CSV Text button. Your new student accounts will be ingested into the system shortly.
This video will walk you through the steps listed above (starts at 2:03):
If you have any problems with importing student accounts, please contact me (chris@chemquiz.net) for help!